WHAT DOES SYNC DO?
Sync is an automatic process that can keep two or more folders in different locations identical. Any change that you make to a folder that is synced will automatically be replicated to all other computers or folders which are a part of this sync.
You can sync folders which are on different computers, or that are in different locations on the same computer.
HOW DO I CREATE A SYNC?
You only need to create a sync on one of your devices. A single sync can synchronize data between two, three, four, or more computers. Any sync that you create will automatically appear on all of the computers that you have included in the sync.
Sync works with backed up folders, so before you begin make sure that the folders you will want to sync have been backed up.
1. OPEN SPIDEROAK ONE OR GROUPS AND SELECT THE SYNC TAB
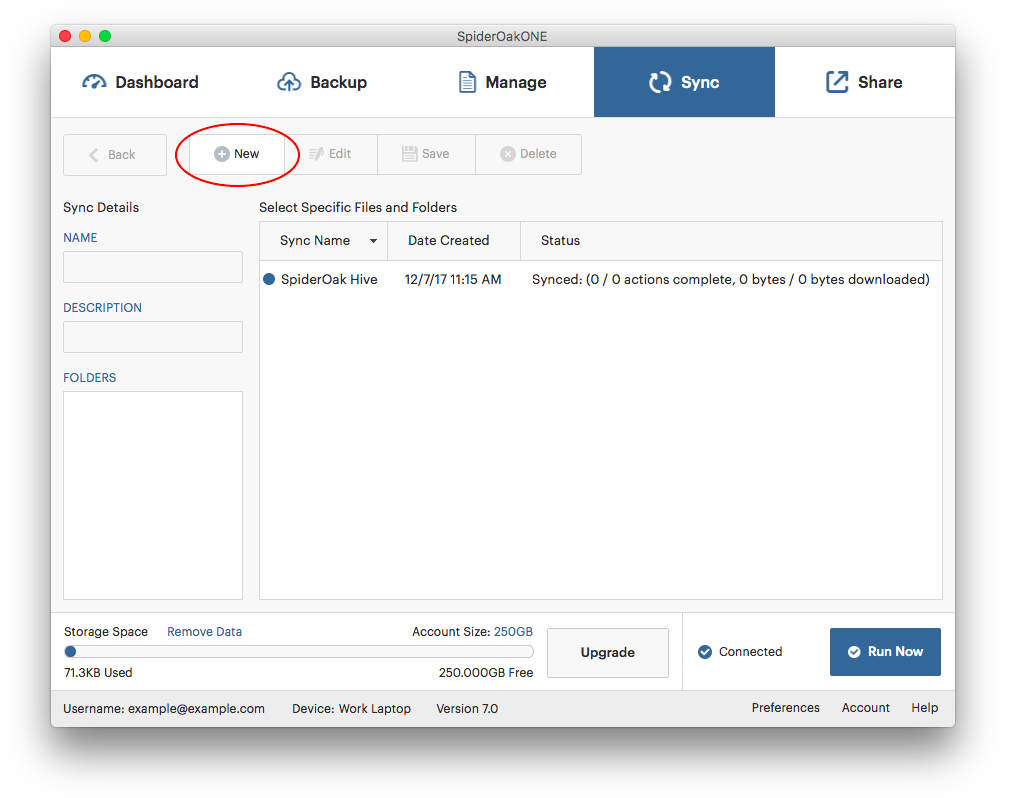
The sync tab will show you any syncs you have already created, which you can edit or delete.
2. OPEN THE SYNC CREATION WINDOW

Pushing "New" will open the sync creation window, where you can enter details about your new sync.
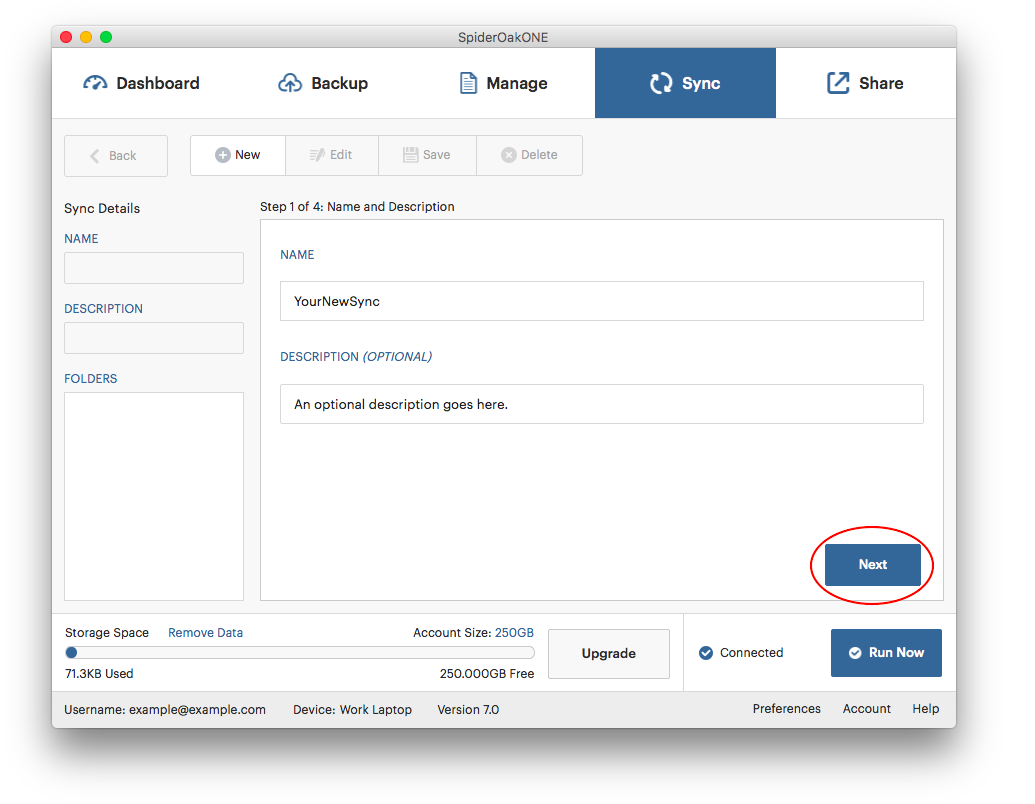
3. ENTER A NAME AND A DESCRIPTION FOR YOUR SYNC

A description is optional. Once you've finished, scroll down and click Next to continue.
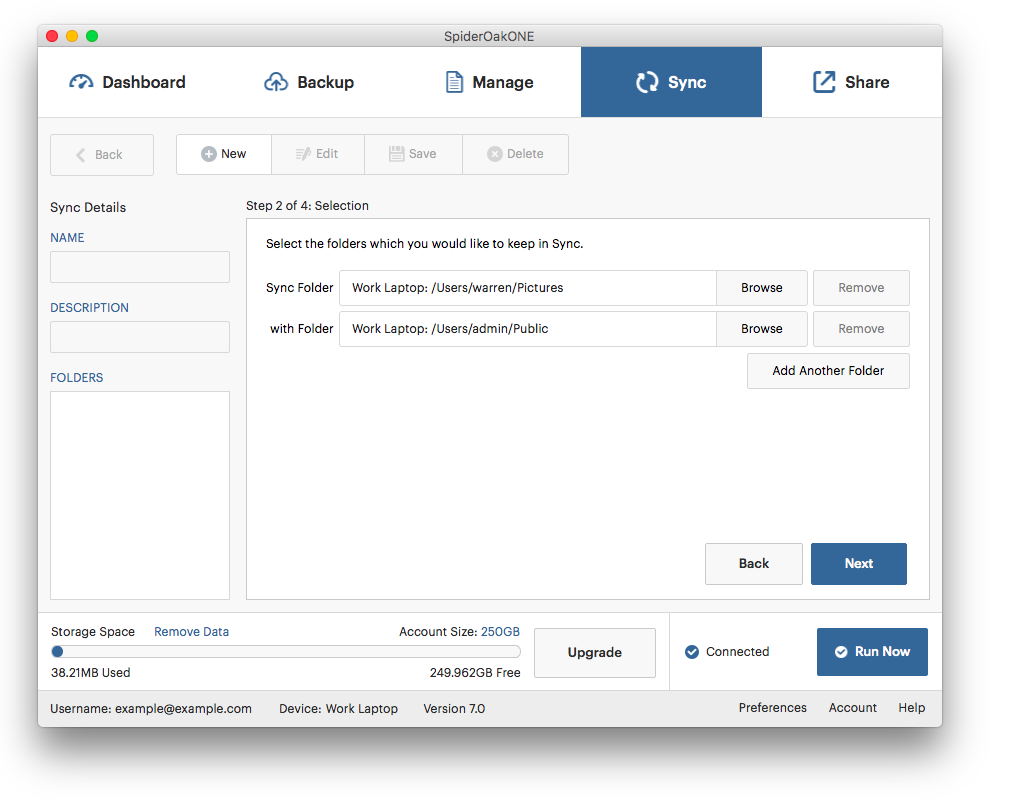
4. ADD FOLDERS TO YOUR SYNC

Click Browse to choose the folders you wish to add to the sync. When you find the folder you wish to sync, click Select.
Do the same for the second folder you wish to sync. To add a third or additional folder, click the red plus sign below your selected folders and another folder selection box will appear. You can sync as many folders as you want.
Remember that you cannot select individual files for sync, only folders. If you try to select a file, the ‘Next’ button will be greyed out. If you only wish to keep a single file in sync, create a new folder for this purpose on each computer, back up those folders, place the desired file inside this new folder on one computer, and select those folders to synchronize.
As mentioned above, Sync works with backed up folders, so you will only be able to select folders that have been backed up. If you do not see the folder you want, first back it up, then return to this step.
When you have finished selecting the folders you wish to keep in sync, click Next.
5.SET EXCLUSIONS
Optionally you may choose any files or types of files that you don't want to be included in the sync. Most people will leave this blank. When you have set any desired exclusions, click Next.
6. CLICK START SYNC
Verify that you have included all the folders you want in the Sync, and click Start Sync.
SpiderOak ONE or Groups will immediately scan these folders to determine what data needs to be downloaded or modified to the most recent version. When the sync completes, all folders in the sync will be identical.
Syncing is the only time that SpiderOak ONE or Groups will ever modify the local copies of folders and files. If one synced file is deleted, all corresponding copies will also be deleted. Any data deleted during a sync will be sent to the Deleted Items bin.
If you have any feedback on this article please let our support team know. Thanks!
